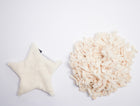
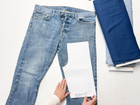
You can make them from an old pair of jeans to match the recycled jeans or from corduroy or another fabric of your choice.
What you need
- our pattern in your size
- matching yarn
- Scissors (paper and fabric)
- sewing machine
- Fabric (jeans or corduroy or cotton)
- cuffs
- pins
Sewing instructions

Step 1
The first step is to cut out all the pattern pieces.

Step 2
Then transfer all the pattern pieces to the fabric and cut them out.

Step 3
In the next step, the outer curve of the umbrella is trimmed. To do this, you need to lay both pattern pieces of the umbrella right sides together (i.e. the outer side of the fabric). Then you can pin the seam or, if you are confident enough to do this without pins, simply stitch the seam at the curve. Don't forget to sew a bartack at the beginning and end of the seam (i.e. briefly back and forth).


Step 4
The head pieces of the hat are sewn in the same way. The only important thing here is that you always leave approx. 1 cm open at the top so that the individual parts can be put together much more easily.

Step 5
When the head piece is finished, you can sew once across the tips from the inside and close the small hole that has appeared.

Step 6
Next, turn the umbrella right side out and trim the corners. It can help to iron the umbrella here.


Step 7
Then pin the umbrella to the center of the cuff and place it between the two cuff pieces, so to speak. Then close the pinned edge with a stitching foot width. Make sure to pull the cuff a little and make the stitch a little smaller so that it remains elastic.

Step 8
Now sew the little bundle to the headboard. The easiest way to do this is to use a few pins to pin it in place. Make sure that the head piece is evenly distributed on the cuff and does not bunch up anywhere. The two parts are pinned right sides together again and then sewn together with a stitching foot width. After the seam is finished, it makes sense to finish the edge with a zigzag stitch.


Step 9
Turn the hat inside out, perhaps iron it and trim all excess threads. Then put it on and explore the world!


